Step 1: Data Preparation
SBV2 training requires (wav file, corresponding text) pairs and speaker metadata.
Creating these manually from recordings alone is time-consuming, so HayaKoe bundles this process into a browser-based GUI.
It is located at dev-tools/preprocess/.
Prerequisites
This step uses FFmpeg for extracting audio from video.
ML dependencies are already included in the uv sync from the Getting Ready section of the full workflow page, but FFmpeg is a system package that needs separate installation.
Installing FFmpeg (Ubuntu / Debian)
sudo apt update
sudo apt install ffmpeg
After installation, verify that the version prints:
ffmpeg -versionRunning
Launch the Preprocessing Tool
# From the repo root
uv run poe preprocess
Open http://localhost:8000 in your browser to see the dashboard.
If you get an "address already in use" error
This means port 8000 is already being used by another program.
The error typically looks like this:
ERROR:    [Errno 98] error while attempting to bind on address
('0.0.0.0', 8000): address already in use
Use the --port option to specify a different available port (e.g., 8123).
uv run poe preprocess --port 8123In this case, the access URL also changes to http://localhost:8123.
Basic Workflow
When you first enter the dashboard, you will see the following screen:
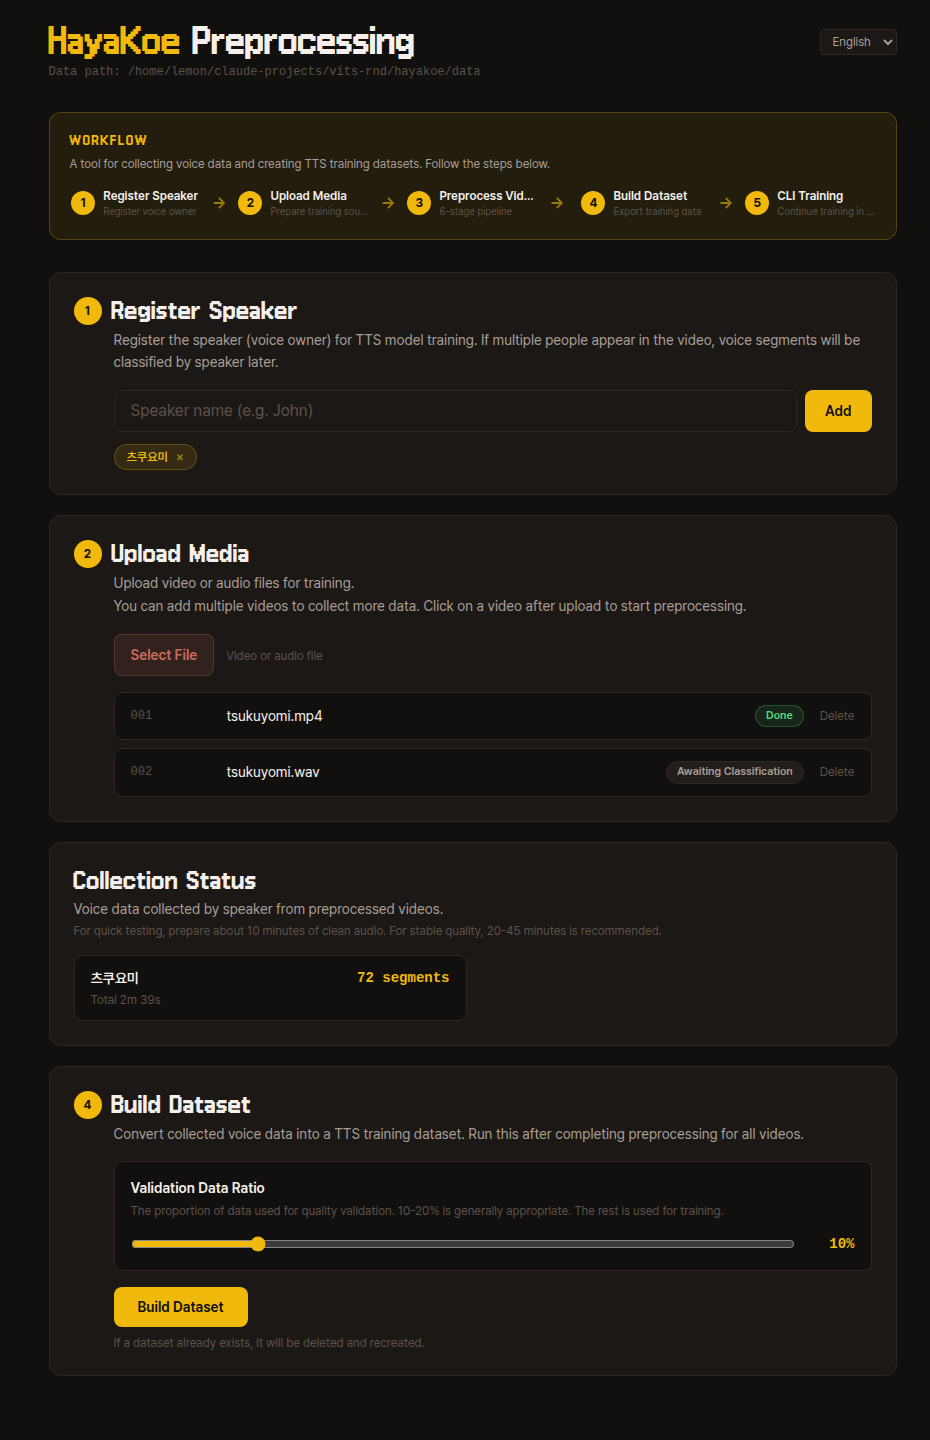
The WORKFLOW area at the top gives an overview of the entire flow, with the same steps laid out as cards below.
Follow from top to bottom — the next step card activates only after the previous step completes.
1. Register Speaker
Register the name of the speaker you want to train.
The speaker name can be any identifier you can recognize (e.g., tsukuyomi).
2. Upload Video
Upload the video that will be the training source.
Audio files like mp3, wav, and flac are also accepted — FFmpeg handles them identically internally.
After uploading, a video card appears in the list. Click it to go to that video's preprocessing pipeline page.
Per-video 6-step Pipeline
Inside a video's detail page, a 6-step progress bar appears at the top, and the NEXT STEP card button runs the current step one at a time.
When each step finishes, it automatically changes to "Complete" and the next step opens.
If interrupted, you can resume from where you left off.
1. Extraction
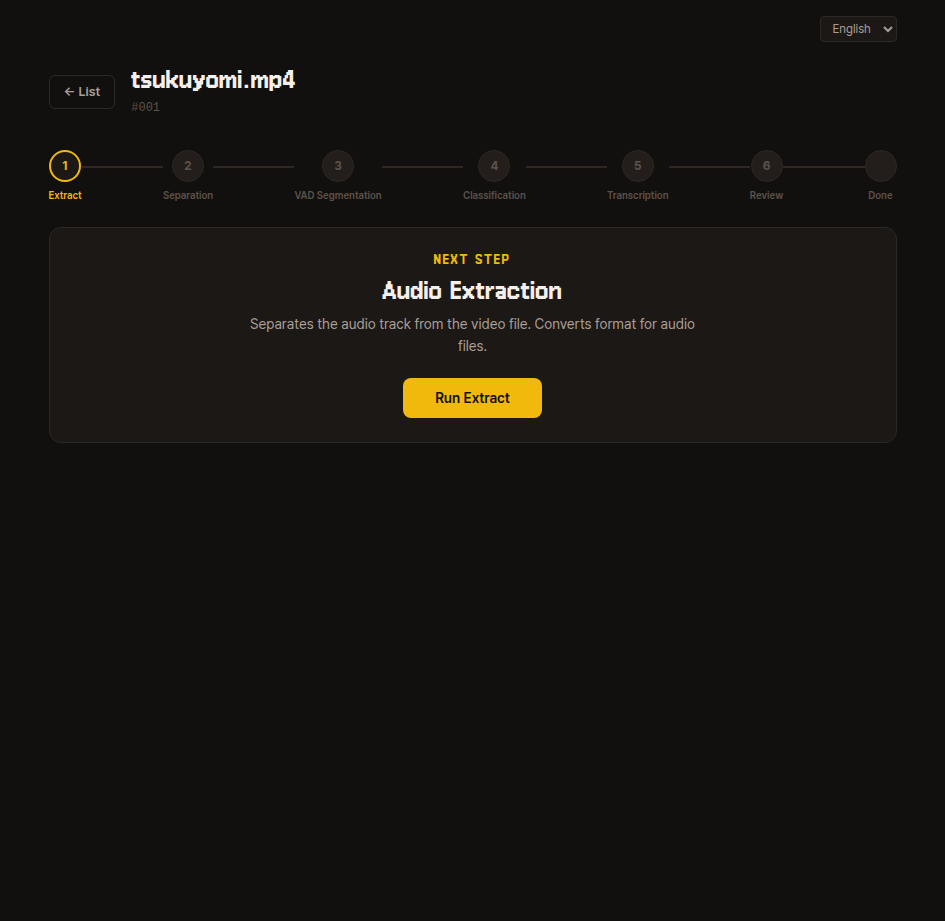
Extracts only the audio from the source data and saves it.
Once extraction finishes, proceed to the next step.
Internal details
Internally uses FFmpeg to extract an extracted.wav file.
If the uploaded file is already an audio file like mp3, wav, or flac, the content is preserved and only the format is converted to wav.
2. Source Separation

Removes background sounds like BGM and effects, leaving only the human voice.
This may take several minutes depending on file length, so please wait.
Internal details
Uses the audio-separator library to isolate vocals and saves them as vocals.wav.
3. VAD Segmentation
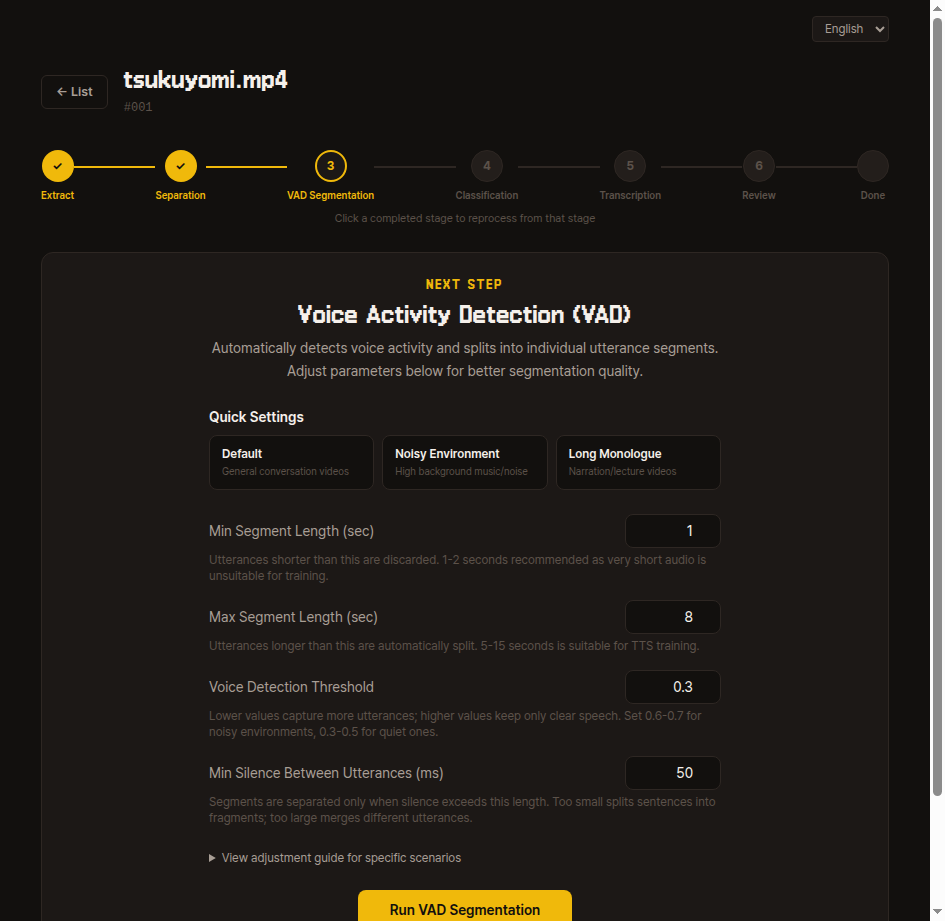
Splits long recordings into short sentence-level segments based on silence boundaries.
Try running with default values first; if the segmentation results are not satisfactory, adjust the four parameters and re-extract from the same video.
- Minimum segment length (seconds) — Segments shorter than this are discarded. 1-2 seconds is recommended for TTS training.
- Maximum segment length (seconds) — Longer utterances are automatically split. 5-15 seconds is appropriate.
- Speech detection threshold — Start with a low value (0.2-0.3) and increase gradually if too much noise is captured.
- Minimum silence between utterances (ms) — Start with the default. If multiple speakers get mixed into one segment, decrease the value; if a single utterance gets split too short, increase it.
Internal details
Uses Silero VAD to detect voice activity regions and saves the results according to the parameters above as vad.json and segments/unclassified/*.wav.
Re-running overwrites segments/unclassified/.
4. Classification
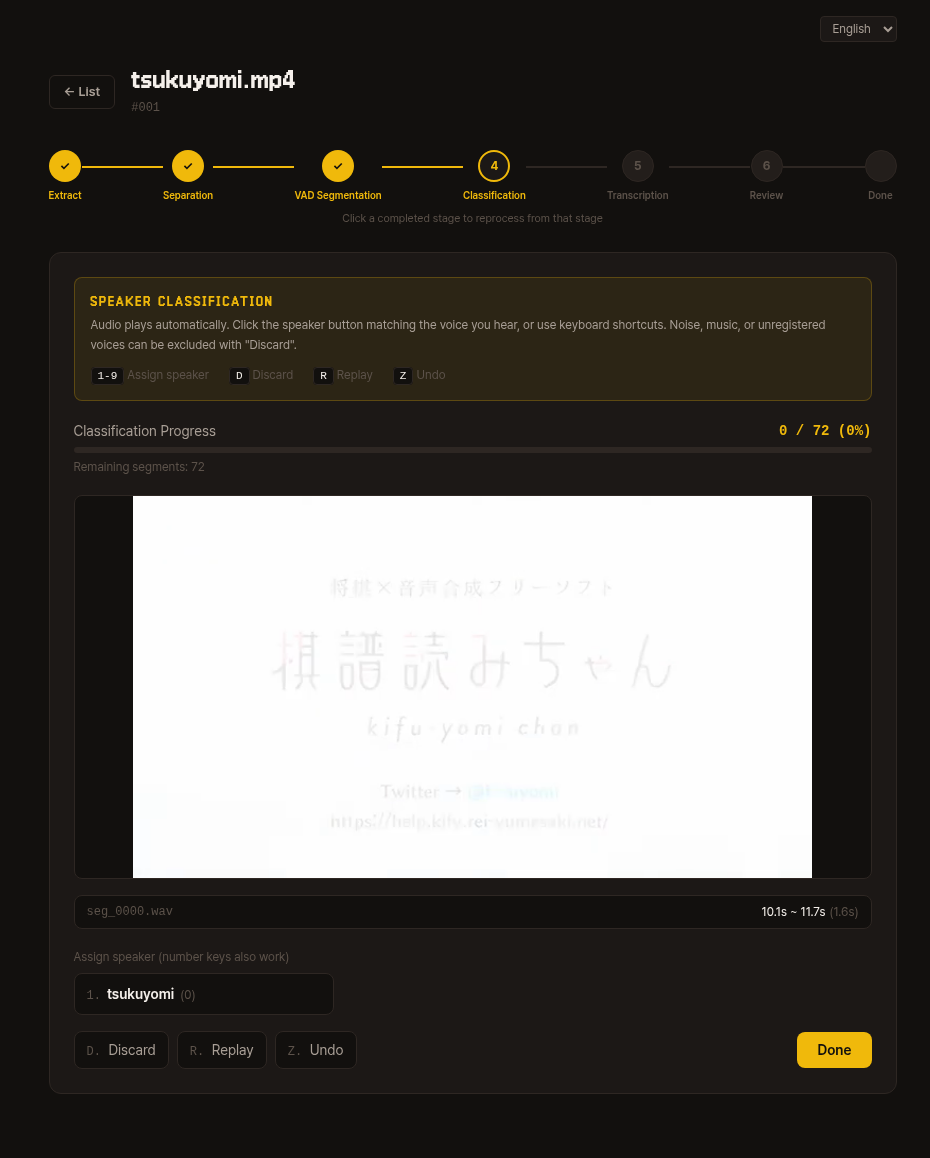
Segmented audio clips auto-play one by one.
Press the speaker number key (1-9) or button to assign each to the matching voice.
Noise, music, or voices from unregistered speakers should be excluded with Discard (D).
| Key | Action |
|---|---|
1-9 | Assign to that speaker number |
D | Discard |
R | Replay |
Z | Undo |
You can check the remaining segment count in the top progress bar. Once all are processed, click the Classification Complete button to proceed to the next step.
Internal details
Classification results are saved in a segments/<speaker>/ structure.
5. Transcription
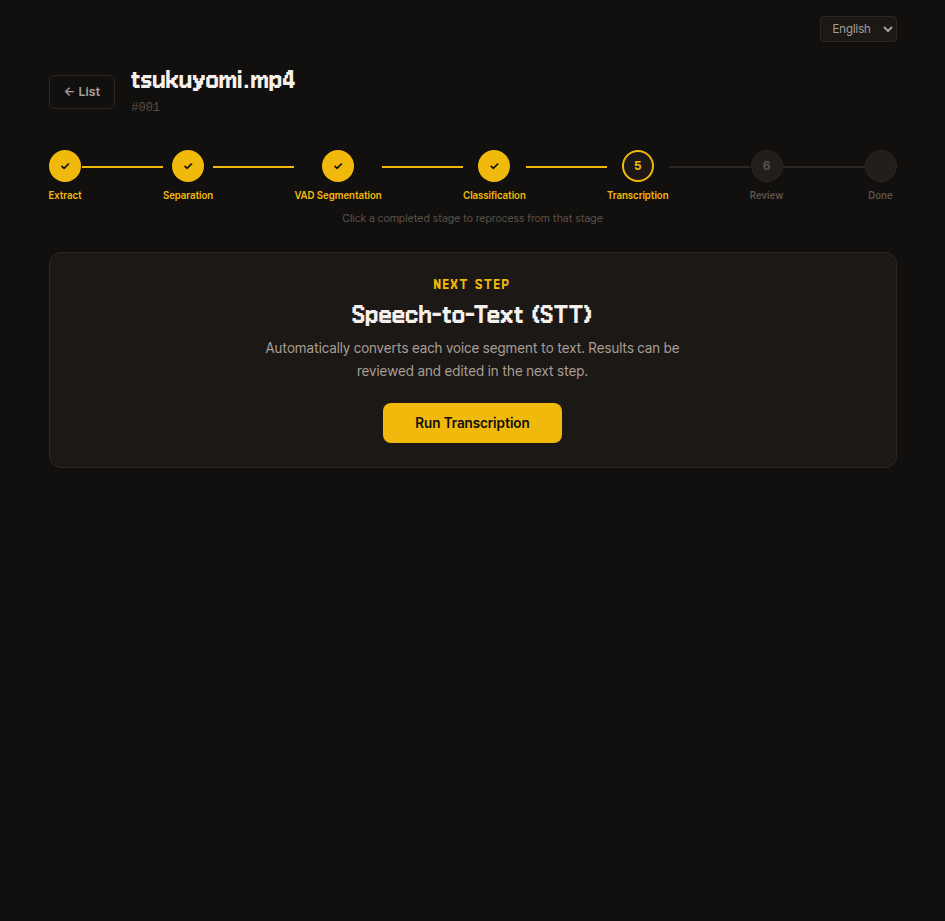
Listens to each segment's audio and automatically converts it to Japanese text.
The results can be corrected in the next step, so just press the run button here.
Internal details
Saves transcription results from the Whisper model to transcription.json.
6. Review
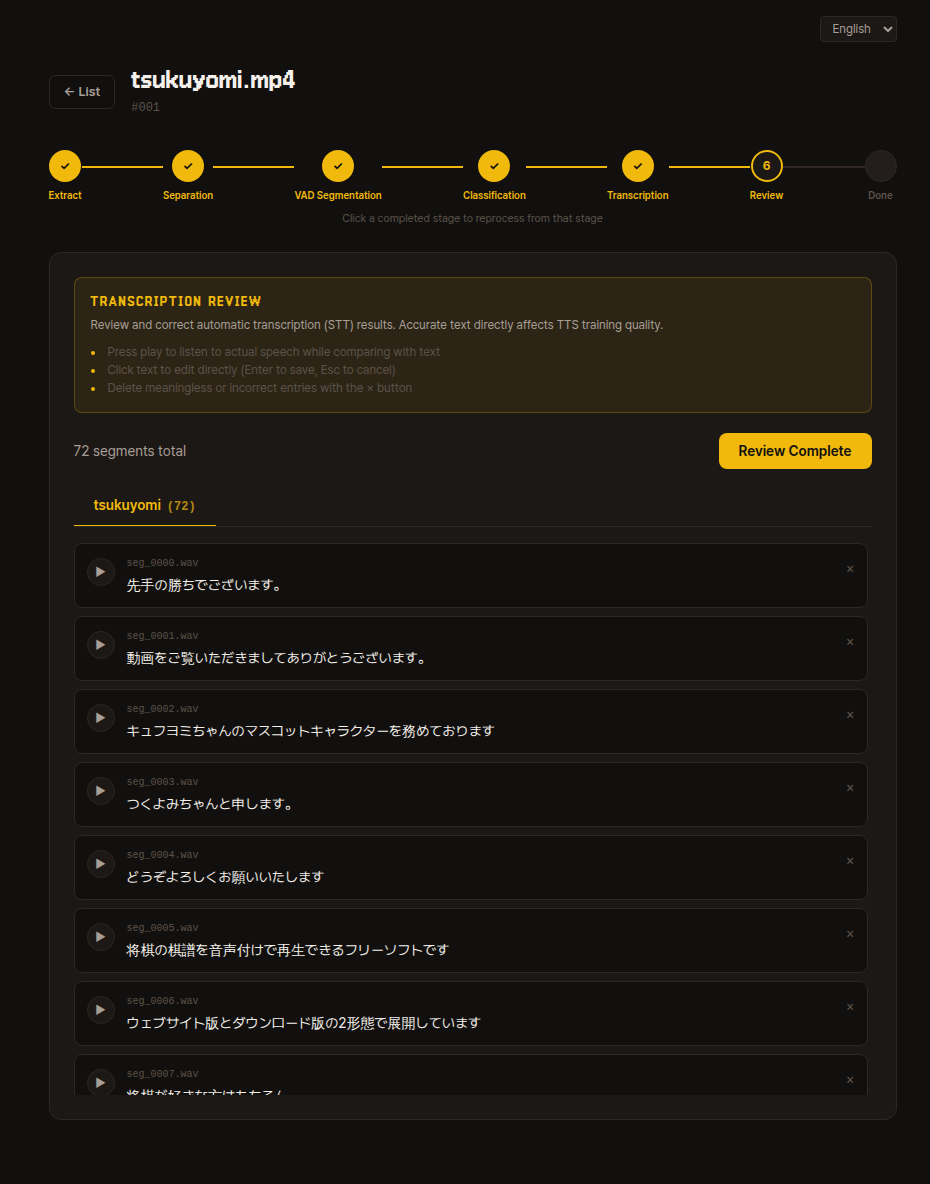
Review and correct the auto-transcription results.
If you do not know Japanese, it is fine to skip this for now. You can come back and fix things later if quality feels low after training.
- Press the play button to listen to the actual utterance while comparing it with the text.
- Click on text to edit directly (
Enterto save,Escto cancel). - Delete meaningless segments or incorrect segments with the
xbutton. - Once you have reviewed everything, click Review Complete in the upper right to proceed.
Internal details
The review completion marker is saved in review_done.json.
Collecting data from multiple videos
You can upload multiple videos for a single speaker.
Repeating the 6 steps for each video accumulates more data and improves training quality. Based on processed data, at least 10 minutes is recommended, and 30 minutes or more is usually sufficient.
Click the Back to List button in the upper left of the video detail page to return to the dashboard and upload the next video. After all videos have been reviewed, proceed to the dataset generation step below.
Dataset Generation
Once all videos have been reviewed, the Generate Dataset button becomes active on the dashboard.
Specify just one value, val_ratio, and the training dataset is automatically created (default 0.1).
What is val_ratio?
It is the proportion of total data held out from training and used for progress checks.
Using only training data risks the model memorizing those specific sentences while producing awkward results for new ones. So some data is intentionally set aside for checking whether synthesis results from that data sound natural during training.
The default of 0.1 (10%) is sufficient in most cases.
The generated dataset is automatically recognized by the Step 2: Preprocessing & Training CLI, so you can proceed directly to the next step.
Internal details — Dataset structure and default settings
Generated directory structure:
data/dataset/<speaker>/
├── audio/                          # All video segments copied to one place
│   └── <video_id>_<orig_seg>.wav
├── esd.list                        # <abspath>|<speaker>|JP|<text>
├── train.list                      # Random split of esd.list (1 - val_ratio) (seed 42)
├── val.list                        # Random split of esd.list val_ratio
└── sbv2_data/
    └── config.json                 # SBV2 JP-Extra default settings
Key defaults in config.json:
model_name: "hayakoe_<speaker>"version: "2.7.0-JP-Extra"train.epochs: 500,batch_size: 2,learning_rate: 0.0001train.eval_interval: 1000,log_interval: 200data.sampling_rate: 44100,num_styles: 7style2id: Neutral / Happy / Sad / Angry / Fear / Surprise / Disgust
These values can be changed in the Edit Training Settings step of Step 2: Preprocessing & Training.
Internal details — Full data/ root structure
Final structure based on --data-dir ./data:
data/
├── speakers.json         # Registered speaker list
├── videos/               # Per-video preprocessing workspace
│   └── <001, 002, ...>/
│       ├── source.<ext>
│       ├── meta.json
│       ├── extracted.wav
│       ├── vocals.wav
│       ├── vad.json
│       ├── segments/
│       ├── classification.json
│       ├── transcription.json
│       └── review_done.json
└── dataset/              # Input for the training step
    └── <speaker>/        # <- CLI auto-detects this path
The CLI automatically lists directories under data/dataset/ that contain esd.list or sbv2_data/esd.list.
Next Step
- Proceed to training with the dataset: Step 2: Preprocessing & Training